With the first episodes of Masters Of The Air having received considerable praise for their air combat sequences especially, the story of the U.S. Army Air Forces (USAAF) in World War II is very much back in the public consciousness. In its initial review of the series, The War Zone noted its attention to detail, especially in the terrifying scenes of B-17s flying into flak or being attacked by Luftwaffe fighters.
The combination of simulated concussive blasts, shrapnel, and machine gun rounds very effectively summon up the chaos of the daytime bomber offensive. Meanwhile, the frantic efforts of B-17 gunners to defend their aircraft from enemy fighters that seemingly press home attacks from every quarter are also a signature motif within this drama.
With that in mind, it’s worth looking at what went into these defensive measures and how they changed as the bomber offensive developed, taking the war ever further into Nazi Germany and occupied Europe.

In the interwar period, proponents of the bomber were convinced that, according to the words of future U.K. Prime Minister Stanley Baldwin, speaking in 1932, “The bomber will always get through.”
With no truly effective defense against bombers, the defenses that armed the bombers themselves were understandably neglected.

Broadly speaking, it was this thinking that saw the bombers of the U.S. Army Air Forces go to war in Europe without fighter escort. The British, for their part, had learned the hard way about the vulnerability of daylight bomber operations without escort and had switched primarily to nighttime raids.
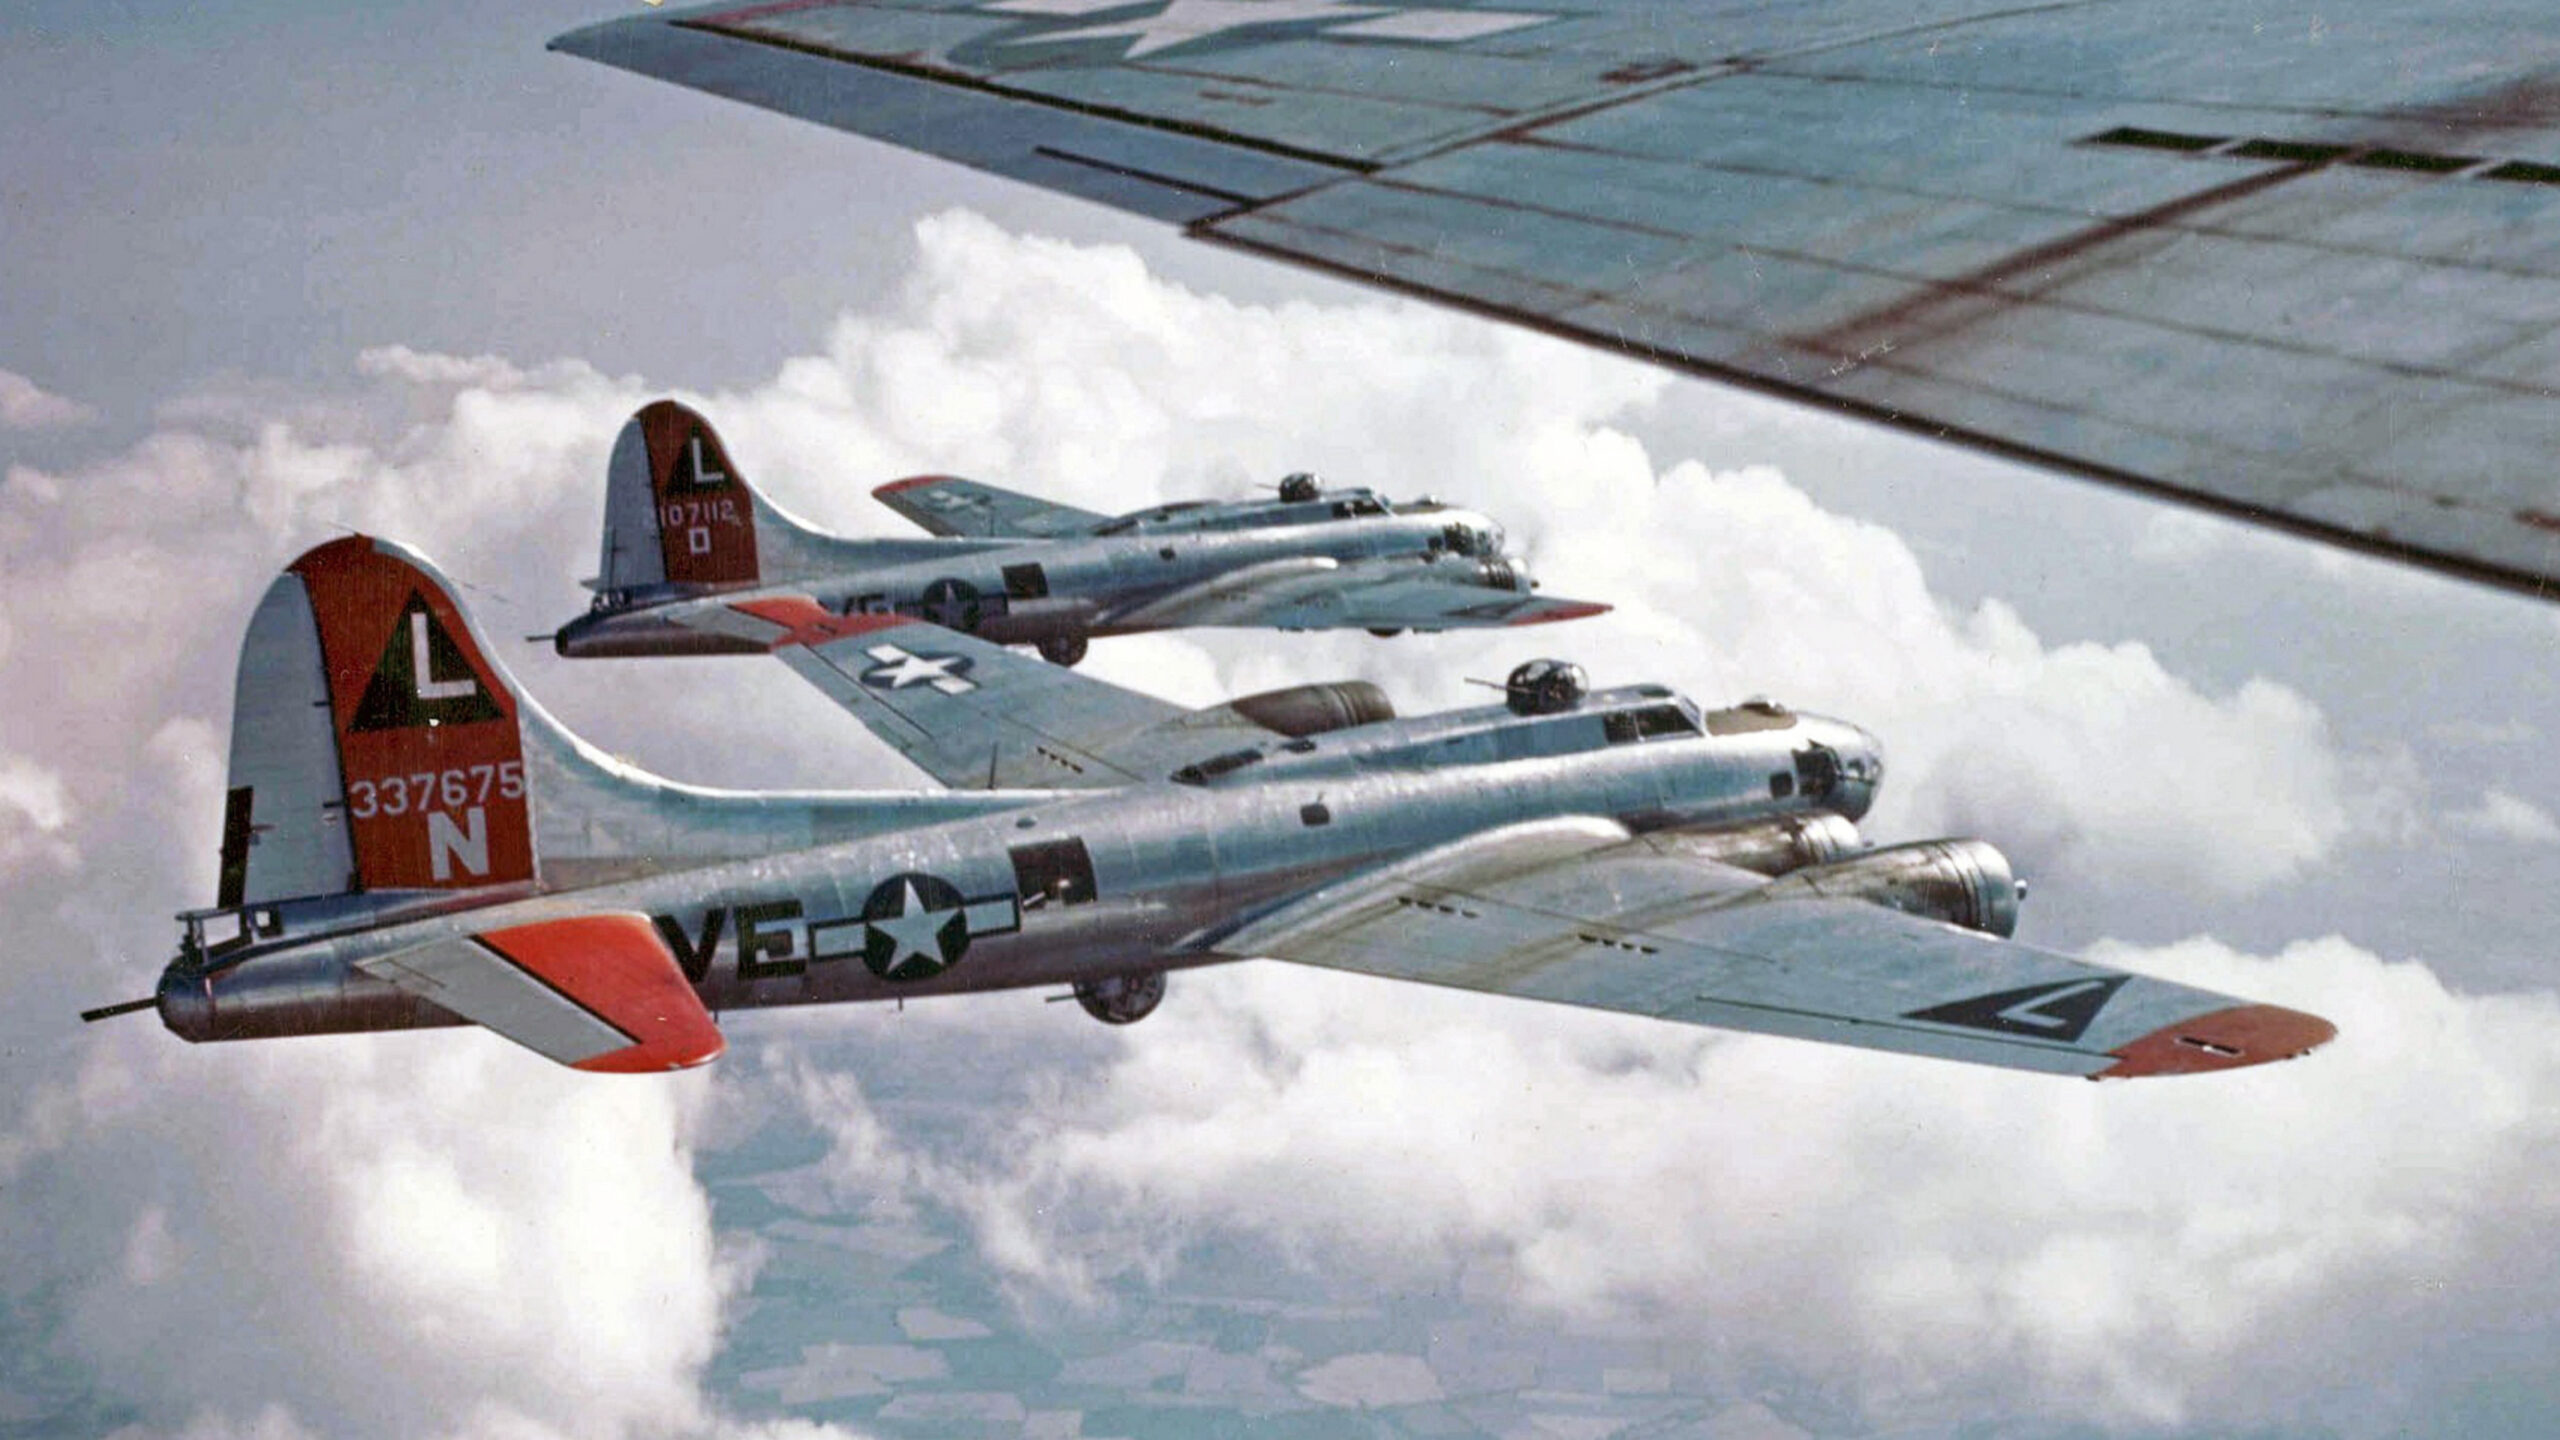
As it was, the USAAF heavy bombers that began flying raids over Europe from their bases in England in the summer of 1942 relied on a combination of formation tactics — primarily the ‘combat box’ and variations of it — and the crew-operated 50-caliber machine guns that armed the B-17s, numerically the most important bomber of the Eighth Air Force flying from England.

The growing realization that a heavy bomber operating in daylight, regardless of formation, could swiftly fall victim to an enemy fighter is reflected in the steady increase in the defensive firepower on the B-17. Defense of the B-17C model was initially entrusted to just four of the ubiquitous 50-caliber Browning M2 machine guns and a single 0.3-inch machine gun in the nose. The ultimate B-17G bristled with 13 50-caliber Brownings, firing at a rate of 750 rounds per minute out to an effective range of around 3,500 feet.
In the B-17G, these guns were located in a twin chin turret, a twin top turret above the fuselage, a twin ball turret below the belly, a twin tail turret, plus single trainable guns in ‘cheek’ positions on either side of the nose, in the radio compartment in the upper fuselage, and in ‘waist’ positions on either side of the rear fuselage. Typically, the ball turret and tail turret were manned by dedicated gunners, while the other guns were operated by other members of the crew as needed.


The top turret and ball turret were electro-hydraulically powered and could bring the guns to bear on a target rapidly, traversing at some 50 degrees per second and electrically fed with ammunition. The tail turret was manually operated while the remaining trainable guns were on pivoted mounts, meaning the gunners had a limited field of fire and had to wrestle with the slipstream as they tried to get the enemy in their sights. Those sights were initially of the primitive ring-and-bead type, later superseded by reflector sights, making deflection shooting more reliable.

Despite the impressive concentration of firepower, an individual bomber remained highly exposed, especially during its run-in to the target, when it needed to fly straight and level.


The combat box was therefore soon developed to provide mutual protection, with interlocking arcs of fire provided by bombers flying in formation and staggered at different levels. This presented Luftwaffe fighters with a bigger problem and helped ensure that bombs were delivered close to the chosen target. This latter point was especially important bearing in mind the high altitudes from which these raids were typically flown. However, these tactics also required the bombers to stay in rigid formation if it was to be successful — counterintuitive when coming under attack from fighters or anti-aircraft fire from the ground.
Ultimately, as formations grew in size, the combat box was refined to become the ‘wing box,’ comprising three staggered 18-plane boxes for a total of 54 bombers. This was especially challenging for crews, with closely packed bombers running into each other’s turbulence and with a risk of bombs from a higher stack hitting aircraft flying below. When it worked, however, the wing box provided roughly 700 defensive machine guns that could be brought to bear on fighter opposition.

As well as falling bombs, there remained the risk of fratricide of another kind, too. While bombers’ gun turrets were designed to fire on arcs that ensured the aircraft’s tail, for example, would not be shot off, the same was not the case for other bombers flying nearby.
Other changes to the combat box tactics followed, including looser formations of 27 or 36 aircraft once flak superseded fighters as the primary threat to the bombers. The need for more spacing was driven by the fact that the detonation of a single anti-aircraft shell from a flak gun could potentially knock out more than one bomber. Once radar-guided Pathfinder groups became available, this also allowed bombers to operate with greater separation between them and still hit their target reasonably accurately, even in poor weather.

Whatever the tactics, the process of getting bombers into compact formation was also far from easy. Considerable training was required beforehand and, for the missions themselves, assembling the bombers in their boxes needed a lot of time and energy on the part of the crews and consumed precious fuel. Some accounts suggested it took roughly an hour to get into formation at the start of a mission. Flamboyantly painted ‘assembly ships’ were among the initiatives developed to make the process easier.
At the same time, the Luftwaffe was adapting its tactics to deal with larger and better-armed USAAF bomber formations. In particular, German fighter pilots made high-speed ‘slashing’ attacks.

Despite the lack of fighter opposition at the start of the USAAF bombing campaign, it was far from easy for the Luftwaffe to bring down a big B-17 or B-24 bomber.
One Luftwaffe report indicated that around 20 hits from 20mm cannon shells (far more destructive than the bombers’ own machine guns) were needed to destroy a USAAF heavy bomber in an attack from the rear. At the same time, the average Luftwaffe pilot would hit a bomber with only around two percent of the rounds they fired; that translated to a requirement of 1,000 20mm rounds to ensure a bomber’s destruction. A Luftwaffe Fw 190 fighter carried only 500 rounds.

It’s notable, too, that as well as adding more defensive guns, the bombers also received more and improved armor, making the Luftwaffe’s task harder still.
Attacking a bomber head-on provided better odds for the Luftwaffe pilot, since the bomber’s forward-firing defensive armament was more limited, and its armor less effective. Destroying a bomber from head-on could be achieved with four or five 20mm hits, according to Luftwaffe studies. However, this was also addressed in the program to up-arm the USAAF ‘heavies,’ including the B-17’s chin turret.

Once again, as the USAAF bombers added guns, the Luftwaffe in turn increased its firepower, adding more ammunition, cannons in ever-heavier calibers, and later even air-to-air rockets. These initiatives may have been driven primarily by the requirement for heavy-hitting weapons that would be more likely to destroy a heavy bomber in a single pass, but they also increasingly out-ranged the bombers’ defensive guns. Fortunately for the Eight Air Force, the 21-cm rocket, despite its large warhead, was less than reliable.
In action, the 21-cm-Werfergranaten (WfG. 21) rocket proved relatively ineffective. “It downed few bombers, but it often damaged planes sufficiently to force them out of formation so that other fighters could finish them off,” the aviation historian Alfred Price recalled.
In October 1943, an Eighth Air Force raid against the ball-bearing production center at Schweinfurt, in southern Germany, demonstrated to USAAF leadership that a different approach would be needed if the bombers were to survive.

By this stage, fighter escorts were available to the USAAF bombers, but, as the Schweinfurt raid of October 14, 1943, demonstrated these protective assets were too few in number and their range too short to ensure adequate protection.
The second Schweinfurt raid saw 291 B-17s sent against the target, of which 60 were lost outright, 17 damaged beyond repair, and another 121 damaged to one degree or another. A staggering 22 percent of the bomber crews involved — around 650 out of 2,900 men — were killed.

The USAAF responded by suspending unescorted daylight bomber raids deep into Germany until February 1944. When they recommenced, P-51B long-range escort fighters were available to provide the bombers with the close defensive protection they so badly needed. Flying ahead of the combat boxes, the P-51s would ultimately wrest control of the skies from the Luftwaffe’s fighter force. They would be aided in this by the tide of the war turning against Germany more generally, depriving it of the resources it needed to try and blunt the Allied bomber offensive.
Between February and June 1944, this combination of factors finally saw the B-17 emerge as a survivable asset. After the successful ‘Big Week’ raids of early 1944, Berlin was now in the USAAF’s sights. The first Eighth Air Force raid on the capital of the Third Reich came in March.

The Luftwaffe’s response, from now on, was fairly tokenistic. The jet-powered Me 262, armed with heavy cannons and also rockets, was a formidable bomber-destroyer but fielded in numbers too small to be meaningful and its operations were hampered by shortages of pilots and fuel. The rocket-powered Me 163, on the other hand, offered blistering performance that allowed it to pass through bomber streams unscathed, but was arguably more lethal for its pilots than the Eighth Air Force.
Until the Eighth Air Force finally got the upper hand over Europe, survival had very much been down to the bravery and skill of the bomber crews themselves. While they were aided by the ability of the B-17, especially, to absorb a significant degree of battle damage, their machine gun armament was more than just a morale-booster.

The bombers’ defensive armament and the tactics designed to best exploit it forced the Luftwaffe to change its approach. Gunners also achieved success, with the Eighth Air Force claiming 6,259 enemy aircraft destroyed by bomber gunners, more than for its fighter pilots. There is no doubt, however, that attributing fighter ‘kills’ was tricky in the heat of combat. Often, multiple gunners would open fire on the same target, observation of confirmed wreckage was far from guaranteed, and there was no gun-camera footage. Limited recognition of gunner aces reflected these realities, but at the same time, their enlisted status (for the most part), meant they were often also omitted from official lists of USAAF aces.

Regardless, their job was a vital one and their mission among the most hazardous imaginable.
“When he was not shooting or being shot at, the gunner’s prime concern was survival,” Bruce D. Callander wrote in the April 1, 1991, issue of Air & Space Magazine.
“Missions lasted up to eight hours, with much of the flying taking place above 25,000 feet. Temperatures dropped as low as minus 60 degrees Fahrenheit in bombers that had no insulation and little heating outside the flight deck. Fleece-lined flight jackets were scant protection. The earliest electrically heated suits often shorted out and burned their occupants. Waist gunners worked through open windows, suffered frozen fingers, and slipped on the spent shells that piled up at their feet. Turret gunners had slightly more protection from the elements, but their cocoons allowed little room to move an aching arm or to stamp a cold foot.”
With hindsight, it’s clear that the availability of high-quality long-range escort fighters in sufficient numbers was the decisive factor in reducing Eighth Air Force bomber losses to a more acceptable level. But until those fighters were fielded, the bomber crews themselves more often than not provided their aircraft with the first and last line of defense.

Interestingly, there was a school of thought in the United Kingdom, at least, that suggested that the Royal Air Force might have been better off removing defensive guns from its World War II bombers altogether.
The theoretical physicist and mathematician Freeman Dyson, in 1943, proposed removing at least some of the gun turrets from Lancaster bombers, to provide what he claimed would be a 50 m.p.h. increase in cruising speed. The unarmed Mosquito relied on its speed for protection from Luftwaffe fighters, but it was a far higher-performing aircraft in general and it seems highly unlikely that an unarmed Lancaster would have been much more survivable.

This brings us again to the morale factor and the very important fact that USAAF and Royal Air Force heavy bomber crews were able to fight back with defensive armament, even if their guns were still at a disadvantage against the Luftwaffe in terms of destructive power.
While precise tallies of the Eighth Air Force gunners’ successes can never be determined, their legacy was continued in the postwar U.S. Air Force, which continued to arm its strategic bombers with guns, finally only in the tail, right up until the B-52H. The B-52H still serves today, albeit with its tailguns now deleted. Fittingly, the B-52 and the service’s other strategic bombers come under the command of the Eighth Air Force — the very same formation whose gunners fought so valiantly for the liberation of Europe back in World War II.
With thanks to Mark Russell.
Contact the author: thomas@thedrive.com